
10 Essential Watercolor Tips for Clean Colors & Stunning Results/ Guest Blog by Caroline Tatham
- Meital Regev, Award-Winning Coffee Artist

- Aug 11, 2025
- 3 min read
Updated: Aug 11, 2025
If you’ve ever found yourself staring at a cloudy paint jar, wondering why your once-vibrant colors now look like they’ve been filtered through dishwater… You’re not alone.
Watercolor is a magical medium - fluid, luminous, and full of surprises, but it’s also a little bit of a diva when it comes to water control.
Use too much, and your painting can turn into an accidental storm cloud.
Too little, and you lose those dreamy blooms and soft blends we all love.
Luckily, the amazing artist and teacher Caroline Tatham has shared her top 10 brilliantly practical watercolor tips for keeping your colors fresh, your textures intentional, and your paper happy.
Whether you’re brand new to painting or have been splashing pigment around for years, these tips will help you get cleaner mixes, avoid muddy disasters, and use the full magic of water in your next watercolor painting.
'My Top Ten Tips for Using Water Wisely When Painting'/ by Caroline Tatham:
1. Keep your water jar clean. It's worth refreshing your water jar regularly to prevent your colours from becoming muddy on the sheet.
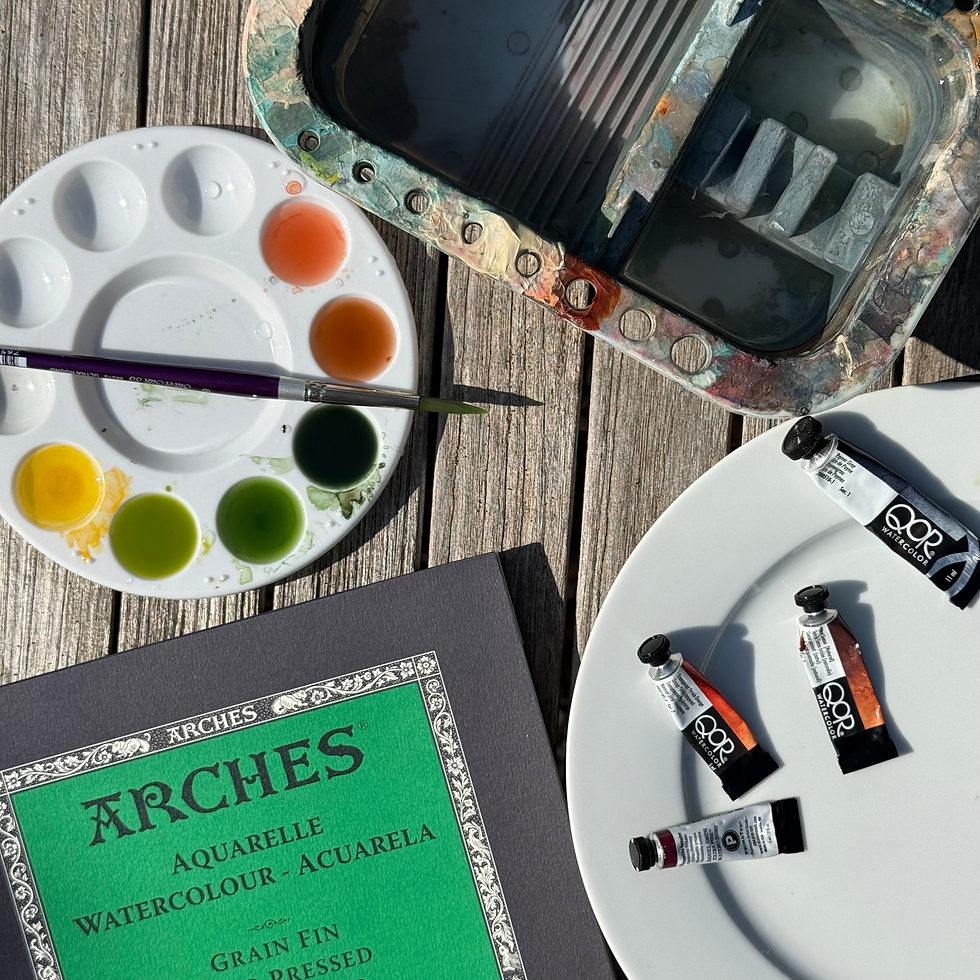
2. Consider investing in a water jar with two separate sections (See photo below).
That way, you can use one section for washing your brushes and another for mixing your colours, thus extending the usefulness of each water refresh.
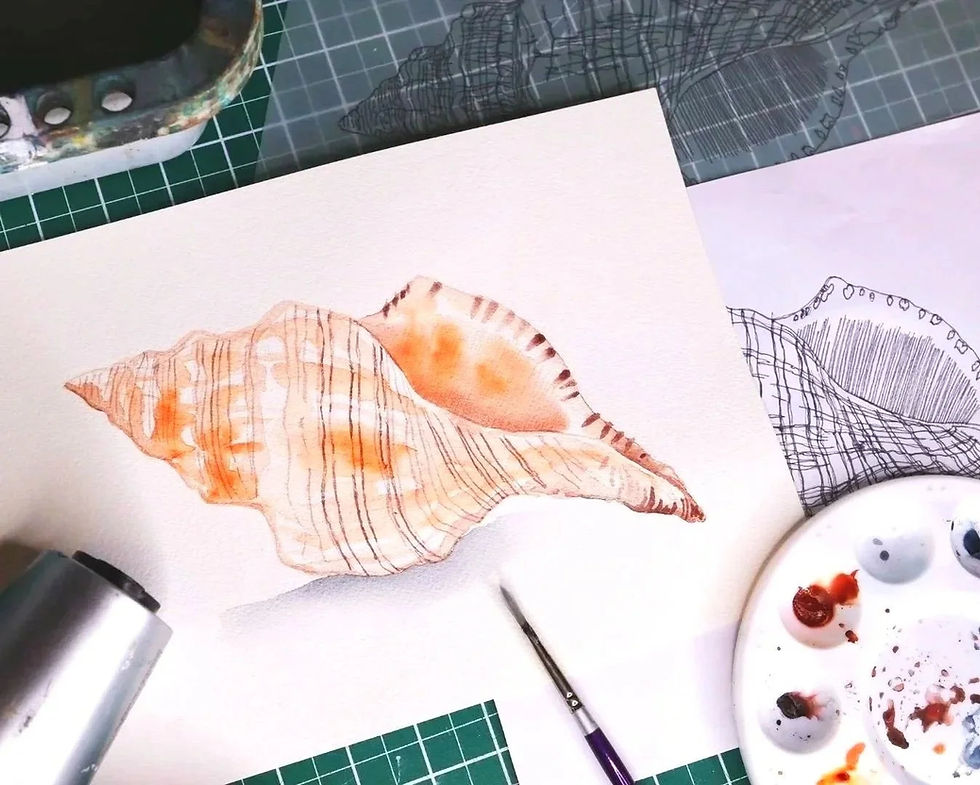
3. Use a clean palette or plate for colour mixing and a pipette for adding water. That way, you can mix up a larger quantity of each colour, ensuring that your work remains consistent and avoids slightly mismatched shades, especially for larger areas such as backgrounds.

4. Mixing colours in a palette before applying to your sheet, allows for more control over your colour application, including how much water you add to the mix. More dilute colours will appear paler on the page.
5. Test your colour mixes on clean paper before applying. You can adjust the amount of water accordingly, but do remember that colours will tend to lighten as they dry.

6. Using more water in your mixes allows for more watercolour 'bloom' textures, those tide mark variations in your paintwork that make your painting feel truly handmade.

7. Experiment with water-based techniques in your sketchbook to become familiar with how water will behave on paper. Try wetting your sheet and adding wet paint to wet paper. This 'wet on wet' technique creates unexpected and beautiful results.
8. Control your paint by laying down wet areas of very diluted paint or just clean water and then add more watercolour - the paint will sweep across your sheet but will be limited to only those areas that you have pre-wetted.
9. If your desired colours are becoming muddy and too blended, try again but this time use glazing. Glazing requires all water to dry out before each layer is added. You may speed this process up using a hairdryer. Glazing builds up transparent layers of colour by restricting the use of water.
10. Finally, use the best quality paper possible. 100% cotton paper ( such as Arches) absorbs water wonderfully and is very forgiving. It will offer you the best 'wet on wet' results and be a tough surface if you need to work on an area with several stages of resetting. The surface will not break down as quickly as cellulose-based papers.
About the Artist - Caroline Tatham:


Caroline is passionate about observing nature to create fanciful, naïve, and imaginative artworks. She studied at The Royal College of Art and has taught at a range of colleges and art schools, including Central Saint Martins School of Art in London. Caroline is a qualified lecturer, and has loved running the Cotswold Gardening School since 2010, she's also passionate about unlocking people's creativity via Caroline Tatham Art courses.
Caroline Website:
Caroline's creative space:


Comments